 Anke
Anke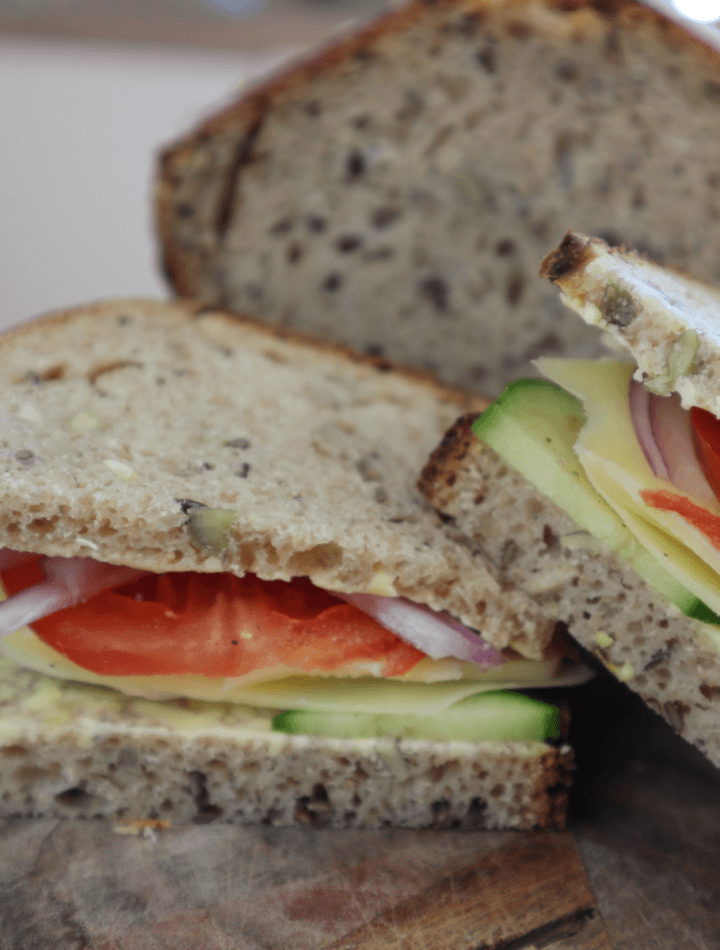
If you’ve ever wanted to learn how to make a seeded sourdough sandwich loaf with an easy-to-follow recipe, this post is perfect for you.
I show you step-by-step how to make a seeded sourdough sandwich loaf that doesn’t require any shaping.
This recipe is great for beginners, and I try to explain the process as simply as possible, especially the stretch-and-fold method.
And if you have questions, please leave them in the comment section below.
Here are a few more simple and delicious sourdough recipes to try: my super easy-to-make Sourdough Focaccia, Fluffy Sourdough Pancakes with buttermilk, and Sourdough Naan Bread.
My sourdough sandwich loaf is not only super delicious. It is also nutritious and easy to digest.
You won’t need any equipment like a proofing basket or a Dutch oven. Instead, you’ll only need two loaf pans.
So, let’s dive in.
Table of Contents
Ingredients
The Flour
For this recipe, I’m using a blend of rye and bread flour.
You could also try spelt with bread flour, just bread flour alone, or a combination of bread and wholemeal flour.
Overall, I’d like to encourage you to experiment with different mixes to find out your favorite.
The Seeds
I use a mix of linseeds, pumpkin seeds, and sunflower seeds, but you can choose to use just one type or experiment with different combinations.
Either way, I prefer using organic seeds for the best results.
Water
To achieve the best results, I always recommend using filtered or distilled water.
The Sourdough Starter
Because the sourdough starter is so important for our bread. I have written an extra detailed paragraph covering the topic. Here it goes…
The Sourdough Starter
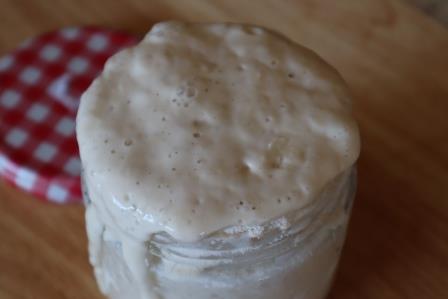
It goes without saying that a good-quality sourdough starter plays an important part in our recipe.
By the way, if you don’t have a sourdough starter yet, I made a comprehensive guide on how to make a sourdough starter. You can watch it here.
My starter usually hibernates in the fridge. To activate the starter, I typically remove it from the fridge a day before I plan to use it.
I feed my starter some flour and filtered water, and let the jar sit in a warm place.
After a few hours, you will see bubbles on the surface of your starter. That means your sourdough starter is ready to use; it is active, so to speak.
Now you can start making the dough for the seeded sourdough sandwich loaf.
Jump to RecipeThe Stretch-And-Fold Method
If you have never performed a stretch-and-fold method, here’s a brief video demonstrating the stretch-and-fold technique. In my view, it’s quite simple to do. Typically, I perform four sets of stretches and folds at 30-minute intervals.
Tip
Keep a small bowl of water next to your dough so you can wet your hands. Wet hands/fingers prevent the dough from sticking to your hands.
How To Do Stretch-And-Folds
To start, wet your hand and grab the outer edge of the dough. Pull it straight up, and fold it over the dough. Slightly turn the bowl and repeat the process with the next section of dough, lifting and folding. Continue this action four to five times, rotating the bowl with each fold.
Now cover the bowl with plastic wrap and let the dough rest for 30 minutes.
Repeat the stretch and fold method three more times, allowing for a 30-minute rest time in between each session.
By the way, you’ll notice how the dough is transforming during the sets of stretch and folds. The dough will transform from a sticky ‘mess’ to a smooth and almost glossy-looking dough.
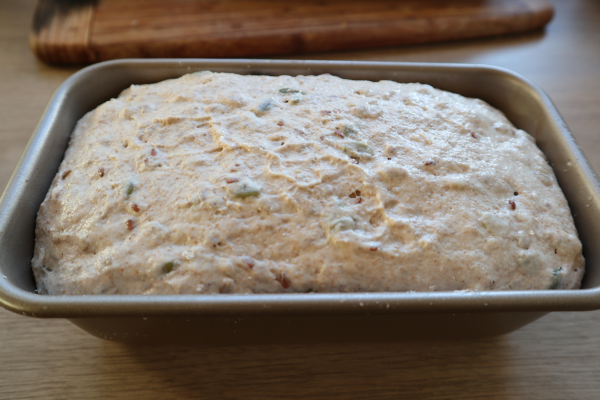
After you’ve finished your last stretch-and-fold, place the dough into the bread pan and cover it with plastic wrap.
Let it rest for at least six hours in a warm place. This step is called bulk fermentation.
When To Bake The Bread
Once the bulk fermentation is finished, after around 6 hours, there are 2 options for you to proceed:
- You can bake the bread after the 6 hours of bulk fermentation.
- Put the dough into the fridge and leave it there overnight. Take the dough out of the fridge and let it sit for around 2 hours to come to room temperature. After that, bake the bread according to the recipe instructions.
Let’s Get Started With Making The Seeded Sourdough Sandwich Loaf
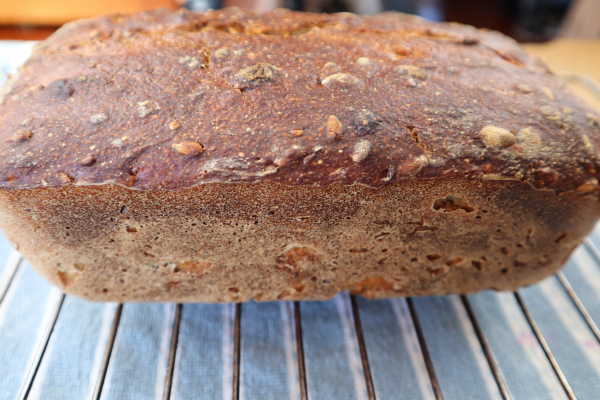
I hope you enjoy baking this flavorful seeded sourdough sandwich loaf.
You can easily double the recipe to make two sandwich loaves at once. The bread freezes well for several weeks.
That way, you always have fresh, healthy, and delicious bread available.
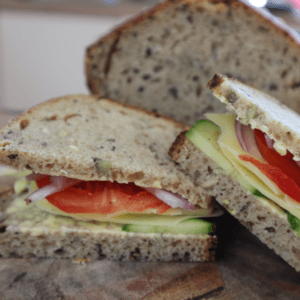
My seeded sourdough sandwich loaf is not only ideal for a nutritious lunch, but it also pairs perfectly with my Soljanka soup or can be loaded with a thick slice of my German meatloaf and a drizzle of the rich gravy.
I would love for you to leave a rating and a comment with your feedback and any questions. Your feedback will help me improve my recipes even more.
Also, if you’d like to join my YouTube subscriber community, click here and feel free to take a look around.
Additionally, the recipe card includes affiliate links for equipment in case you need any kitchen gadgets.
Are you feeling hungry? Then, put on your apron and start making this sourdough sandwich loaf with seeds.
Seeded Sourdough Sandwich Loaf
Equipment
- cling wrap or something similar to cover the bowl
- 1 danish dough whisk or a fork
- 1 tablespoon
Ingredients
To Activate The Sourdough Starter
- 1 cup filtered water lukewarm
- 3/4 cup bread or rye flour
The Dough
- 300 ml filtered lukewarm water
- 1/2 cup active sourdough starter
- 100 grams Greek or full-fat yogurt
- 250 grams rye flour
- 250 grams bread flour
- 2 tsp Himalayan salt or sea salt
- 2 tbsp linseeds
- 3 tbsp pumpkinseeds
- 3 tbsp sunflowerseeds
Instructions
Activate Your Sourdough Starter
- Take your starter out of the fridge and leave it covered until it has reached room temperature (at least an hour).
- Feed it with lukewarm filtered water and flour. You may have to add a little bit more flour to reach your preferred consistency.Stir until well combined.1 cup filtered water, 3/4 cup bread or rye flour
- Cover the container with a cloth and let it sit in a warm place for a few hours. Once it has risen and formed bubbles, your starter is ready to be used.
Making The Dough
- Add the water together with the sourdough starter and yogurt to a large bowl.300 ml filtered lukewarm water, 1/2 cup active sourdough starter, 100 grams Greek or full-fat yogurt
- Stir until well combined.
- Add the flour, salt, and the seeds, and stir again.250 grams rye flour, 250 grams bread flour, 2 tsp Himalayan salt, 2 tbsp linseeds, 3 tbsp pumpkinseeds, 3 tbsp sunflowerseeds
- I am looking for a shaggy dough, so if the mixture looks a bit dry, add a few drops of water.
- Cover the dough and let it rest for 30 minutes.
Stretch And Fold
- Fill a small bowl with water to wet your hands before performing the stretch and fold technique.
- Grab one outside part of the dough and pull it slightly up. Then lay it on top of the dough.
- Rotate the bowl and grab the next piece of dough. Pull it up and lay it on top. Repeat the process three more times.
- Cover the dough and let it rest for 30 minutes.
- After 30 minutes, we do the second round of stretch and fold. Follow the process as described above.
- Cover again and wait another 30 minutes. Stretch and fold again. And then one last time. All up, we perform stretch and fold 4 times.
Proofing
- After the last stretch and fold, place the dough into the baking pan. Cover and let it rest (proof) in a warm place for at least 6 hours.
- After 6 hours, you can either bake the bread straight away or leave it in the fridge overnight.If you leave the dough overnight, take it out of the fridge and let it come to room temperature (around 2 hours).Then you can bake it.
Baking The Bread
- Preheat the oven to 220℃/428℉ on the fan-bake setting. Score the bread lengthwise with a sharp knife and cover the loaf pan with another pan.
- Put it into the oven and bake covered for 20 minutes.
- After 20 minutes, lower the oven temperature to 180℃/350℉, remove the top loaf pan, and continue baking the bread for an additional 25 minutes.
- Remove the bread from the oven, carefully lift it from the pan, and allow it to cool completely on a wire rack.
- Enjoy slices of bread with your favorite toppings!